Table of Contents
ToggleMost homeowners treat their bedroom ceiling like an afterthought, slap on some white paint and call it done. But that fifth wall offers real design potential, and ignoring it means missing a chance to add dimension, character, and even perceived square footage to the room where you spend a third of your life. Whether you’re planning a full renovation or just want to refresh a tired space, understanding your ceiling options can turn a flat, forgettable room into something worth waking up to. This guide walks through proven ceiling treatments, from structural upgrades to finish work, so you can make informed choices that match your skill level and budget.
Key Takeaways
- Bedroom ceiling design transforms overlooked space into a powerful design element that adds dimension, character, and the illusion of higher ceilings.
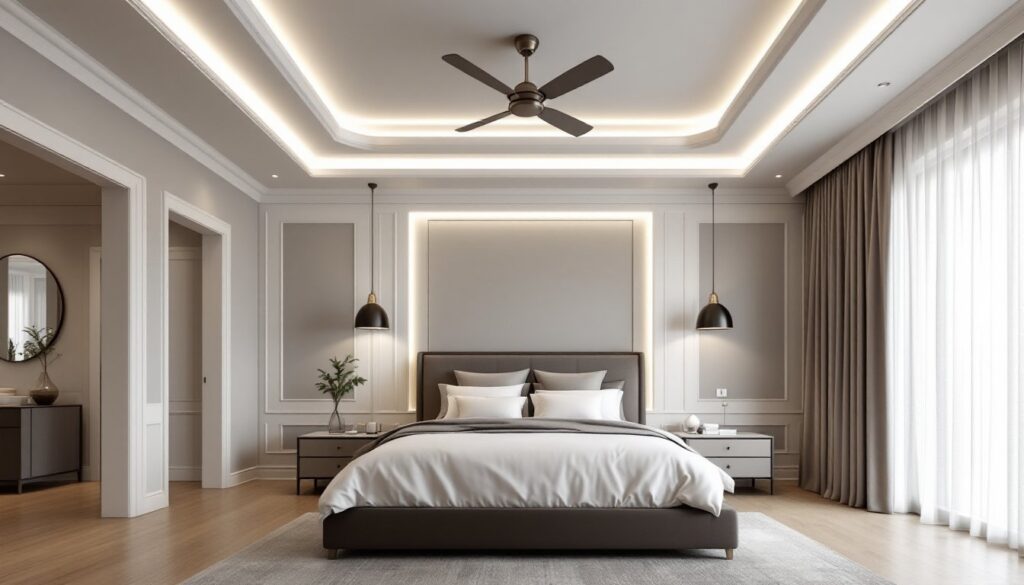
- Tray ceilings, coffered ceilings, and exposed beams offer distinct architectural styles suited to different room sizes and aesthetic preferences, with tray ceilings adding depth in 12×12+ rooms and coffered designs requiring at least 9-foot ceilings.
- Paint color, texture, and paneling finishes—from soft blues and greens to tongue-and-groove wood—create a cohesive bedroom atmosphere more affordably than structural upgrades.
- Strategic lighting integration, including recessed lights, LED strip lighting, and pendant fixtures, is essential to maximize the impact of any ceiling design choice.
- Faux beams and peel-and-stick ceiling tiles offer budget-friendly alternatives to structural work, making bedroom ceiling design accessible to DIY enthusiasts with various skill levels.
Why Your Bedroom Ceiling Matters More Than You Think
The ceiling is the largest uninterrupted surface in most bedrooms, yet it’s the least decorated. That’s a missed opportunity. A well-designed ceiling draws the eye upward, making standard 8-foot rooms feel taller and more open. It also provides a natural anchor for lighting, something bedrooms often lack compared to kitchens or living areas.
From a practical standpoint, ceiling work can address real problems. Adding texture or architectural detail helps break up sound reflections in rooms with hard flooring. Crown molding and ceiling treatments can hide imperfections where walls meet the ceiling plane, especially in older homes where settling has caused cracks or gaps. And if you’re dealing with popcorn texture from the 1980s, a design upgrade is often the cleanest way to eliminate it without the mess of scraping.
Finally, the ceiling affects how light behaves in the room. Flat white reflects light evenly, but it’s neutral to a fault. A coffered or tray ceiling creates shadow lines that add depth. Painted or stained wood introduces warmth. Even a subtle color shift, say, a soft gray or taupe, can make the space feel more intentional without overwhelming the room. Bedroom ceiling ideas don’t have to be dramatic to be effective: small changes in plane, texture, or finish often deliver the biggest impact.
Popular Bedroom Ceiling Design Styles to Consider
Tray Ceilings for Added Depth and Elegance
A tray ceiling (sometimes called an inverted or recessed ceiling) features a center section raised 6 to 12 inches higher than the perimeter. Think of it as an upside-down tray. This treatment works best in rooms at least 12×12 feet with existing ceiling heights of 9 feet or more, though some builders retrofit them into 8-foot ceilings by dropping the border rather than raising the center.
Framing a tray ceiling involves building a border soffit with 2×4 or 2×6 lumber, then finishing with drywall. The raised center is usually painted a contrasting color or finished with wallpaper, while the dropped border often includes recessed lighting or LED strip lights. This is not a beginner-level project, you’ll need to account for joist direction, electrical rough-in, and drywall finishing at multiple planes. Budget a weekend for framing and another for finishing, assuming you have drywall experience.
Tray ceilings suit transitional and contemporary bedrooms well. They add formality without the heavy ornamentation of coffered designs. If you’re working with a ceiling fan, the center recess provides an ideal mounting location that keeps the fan visually separated from the border lighting. Material costs typically run $3–$6 per square foot for framing and drywall, not including paint or electrical, though prices fluctuate based on local lumber rates.
Coffered Ceilings for Classic Architectural Interest
Coffered ceilings use a grid of recessed panels framed by beams, creating a waffle-like pattern. Historically, coffers were structural, think exposed joists in old libraries or government buildings. Modern versions are decorative, built with 1×6 or 1×8 pine or MDF boards installed directly over drywall in a repeating grid, usually 24 to 36 inches on center.
Installation involves snapping chalk lines to map your grid, then securing the boards to ceiling joists with finish nails and construction adhesive. You’ll miter the corners at 45 degrees, so a miter saw is essential (a coping saw works for inside corners, but it’s slower). Paint or stain the boards before installation to avoid tedious overhead brushwork, then caulk seams and touch up after mounting.
Coffers add traditional, even formal, character. They’re a natural fit for bedrooms with wainscoting, crown molding, or built-in furniture. For modern interpretations, skip the stain and use the same white or off-white as the ceiling for a subtle, monochromatic grid. Material costs range from $4–$10 per square foot depending on wood grade and finish. Coffered ceilings require at least 9-foot ceilings to avoid a claustrophobic feel: if your room is 8 feet, consider modern ceiling alternatives that emphasize clean lines instead.
Beamed Ceilings for Rustic and Modern Charm
Exposed or faux beams bring texture and directionality to a bedroom ceiling without the complexity of coffers. Real structural beams (solid sawn timbers or engineered lumber) are rare in modern residential framing, so most “beamed” ceilings use hollow faux beams made from polyurethane, wood veneer, or reclaimed lumber mounted to the ceiling with lag screws or mounting blocks.
Faux beams are lightweight and easy to handle solo. Measure and mark your beam locations, running perpendicular to joists gives the strongest attachment. Screw mounting blocks (usually 2×4 chunks) directly into joists at 24-inch intervals, then slide the hollow beam over the blocks and secure from below with finish screws. For a rustic look, choose distressed or hand-hewn textures. For modern or industrial bedrooms, go with smooth, stained wood or even painted black beams against a white ceiling.
Beams work in nearly any ceiling height, though spacing matters. In an 8-foot room, limit yourself to two or three beams to avoid visual clutter. In 10-foot or vaulted ceilings, you can add more without crowding the space. Polyurethane faux beams run $30–$100 per linear foot depending on width and finish: reclaimed wood costs more but offers authentic character. For those interested in broader ceiling design ideas for the bedroom, beams pair well with shiplap, tongue-and-groove paneling, or even painted planks.
Creative Finishing Touches: Paint, Texture, and Materials
Once the structure is in place, finish work defines the final look. Paint is the simplest and most cost-effective route. A ceiling doesn’t have to be white, soft blues, greens, and warm grays create calm, cocoon-like atmospheres in bedrooms. Use flat or matte ceiling paint, which hides imperfections better than satin or semi-gloss. One gallon typically covers 350–400 square feet: a standard 12×14 bedroom ceiling needs about half a gallon.
For added interest, consider a subtle texture. Skip popcorn and knockdown unless you’re matching existing finishes elsewhere in the house. Instead, try a light orange peel texture applied with a hopper gun or roller, or use a skim coat of joint compound dragged with a trowel for a Venetian plaster effect. Texture adds depth and forgives minor drywall flaws, but it’s harder to paint over later, so commit to the look.
Paneling is another finishing option gaining traction. Tongue-and-groove pine or cedar planks (usually 1×6 nominal, actually 3/4″ × 5-1/2″) install directly over drywall with a brad nailer. Run planks parallel to the longest wall for a streamlined look, or create a herringbone or diagonal pattern for visual interest. Stain or whitewash the wood before installation. Expect to pay $2–$5 per square foot for material, plus finishing costs. Shiplap offers a similar aesthetic with slightly wider gaps between boards: it’s trendy but can feel busy in smaller bedrooms, use it sparingly or on a single accent plane.
For a budget-friendly modern look, consider peel-and-stick ceiling tiles made from PVC or faux tin. They install over most flat surfaces with adhesive and can mimic pressed metal or geometric patterns. They won’t pass for custom millwork, but they’re DIY-friendly and add texture for under $1 per square foot. Always wear safety goggles and a dust mask when cutting or sanding any ceiling material, working overhead means debris falls directly toward your face.
Lighting Integration for Maximum Impact
Ceiling design and lighting are inseparable. A tray or coffered ceiling without a lighting plan is just expensive drywall. Recessed lighting (can lights) works well in tray borders and between coffers, spaced 4 to 6 feet apart. Use IC-rated (insulation contact) housings if your ceiling is insulated, and match bulb temperature to the room’s purpose, 2700K to 3000K warm white suits bedrooms better than the harsh 5000K daylight bulbs common in kitchens.
For tray ceilings, LED strip lighting installed along the top edge of the dropped border creates a soft, indirect glow that highlights the raised center. Use IP20-rated flexible LED strips with an in-line dimmer: they’re low-voltage (12V or 24V), so you’ll need a compatible transformer. This is low-risk electrical work, but if you’re uncomfortable with wiring, hire a licensed electrician. Electrical work in bedrooms must meet NEC (National Electrical Code) standards, and many jurisdictions require permits for new circuits or junction boxes.
Pendant lights and chandeliers benefit from ceiling medallions or recessed mounting cups in coffered or beamed designs. Ceiling fans remain practical in bedrooms, but they visually compete with detailed ceilings, choose low-profile or flush-mount models to minimize bulk. If you’re adding a fan to a new tray or coffered ceiling, plan the framing to include a fan-rated electrical box secured to solid blocking, not just drywall.
Finally, don’t overlook natural light integration. Skylights or solar tubes can turn a dark bedroom into a bright retreat, and they pair beautifully with vaulted or beamed ceilings. Skylights require roof penetration and flashing, not a DIY job unless you have roofing experience and are comfortable with potential leaks. For those exploring broader design trends, resources like interior design guides can offer inspiration on balancing natural and artificial lighting in bedrooms.