Table of Contents
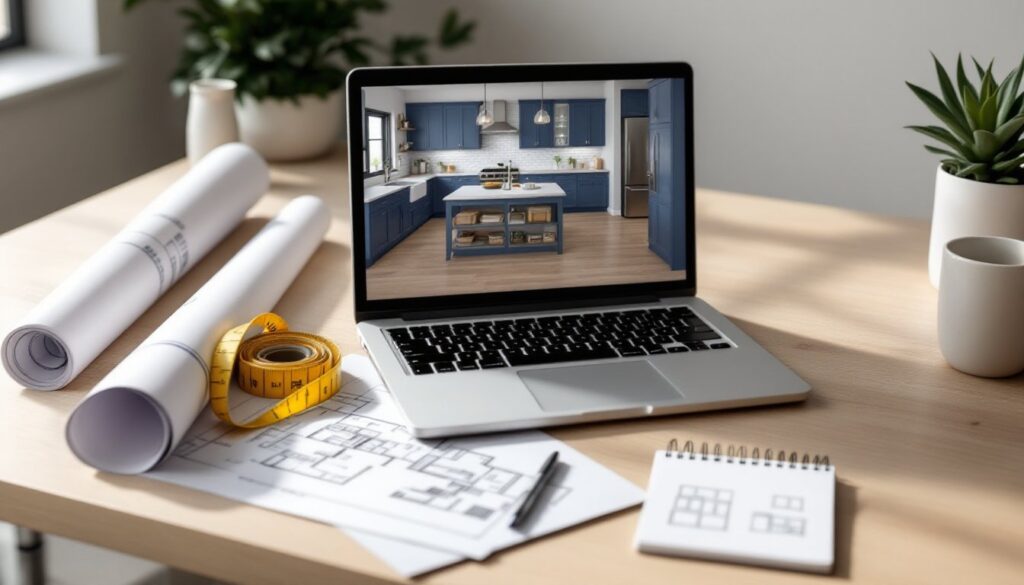
ToggleBefore you demolish a single tile or order your first cabinet, there’s a smarter move: visualize the finished space. Kitchen and bath design software lets homeowners sketch layouts, test finishes, and catch expensive mistakes, all before the first nail gets driven. Whether planning a cosmetic refresh or a full gut renovation, the right digital tool saves time, reduces waste, and gives contractors a clear blueprint to follow. No need to interpret sketches on a napkin or hope the contractor “gets” your vision. Today’s software puts professional-grade layout tools in the hands of DIYers, and many options are free or low-cost.
Key Takeaways
- Kitchen and bath design software helps homeowners visualize finished spaces, test finishes, and catch costly mistakes before construction begins, saving time and reducing waste.
- Accurate measurements and dimension verification are critical—using design software to confirm appliance placements, clearances, and fixture locations prevents expensive returns, delays, and rework.
- The best kitchen and bath design software combines 2D floor plans for precision with 3D visualization for aesthetics, plus material libraries, rendering tools, and export options for contractor communication.
- Free design tools work well for simple projects like a bathroom vanity swap, while paid software ($10–$50/month) is worth the investment for complex renovations involving structural changes or multi-room coordination.
- Always model door swings, drawer clearances, plumbing routes, electrical requirements, and ventilation in your design software to avoid costly on-site surprises and ensure code compliance.
Why Use Design Software for Your Kitchen and Bathroom Projects
Remodeling without a plan is expensive guesswork. Design software eliminates surprises by letting users map exact dimensions, test appliance placements, and confirm clearances before ordering materials.
Accurate measurements matter. A standard dishwasher requires a 24-inch-wide opening, but a 23.5-inch gap means returns, delays, and frustration. Software helps verify that a 36-inch vanity actually fits between the toilet flange and shower curb, accounting for baseboard and door swing.
Visualize finishes and fixtures. Swapping subway tile for hexagon tile, or white cabinets for navy, takes seconds in software. In real life, it’s demolition, reordering, and budget overruns. Seeing a 3D render clarifies whether that farmhouse sink works with your counter depth or if the freestanding tub leaves enough room for a linen closet.
Communicate clearly with contractors. Handing a contractor a dimensioned floor plan with material callouts beats pointing and saying “something like this.” It reduces miscommunication, speeds up quotes, and ensures everyone’s on the same page before the first cut.
Design software also helps identify structural concerns early. If moving a wall means relocating plumbing vents or HVAC ducts, the software won’t flag code violations, but it will show the layout conflict, prompting a call to a licensed plumber or HVAC tech before framing starts.
Top Features to Look for in Kitchen and Bath Design Software
Not all design tools are built the same. The best options for DIYers balance power with usability and include these core features:
Accurate dimension input and snapping. Software should accept real measurements (in feet and inches) and snap walls, cabinets, and fixtures to standard intervals. Look for programs that recognize nominal vs. actual lumber sizes and standard fixture dimensions (e.g., 60-inch tubs, 30-inch base cabinets).
2D and 3D views. A top-down 2D floor plan clarifies layout and clearances. A 3D walkthrough shows how finishes, lighting, and sightlines come together. Both views are essential, one for precision, one for aesthetics.
Material and fixture libraries. Pre-loaded catalogs of cabinets, countertops, tile, flooring, and plumbing fixtures save time. Bonus if the software includes actual product specs from major manufacturers, so dimensions and styles match what’s available at the lumberyard or home center.
Lighting and rendering. Basic rendering shows color and texture. Advanced rendering simulates natural light at different times of day, helping users choose paint colors and understand how a north-facing bathroom will feel versus a south-facing kitchen.
Export and sharing options. The ability to export PDFs, dimensioned drawings, or material lists makes it easy to share plans with contractors, get accurate quotes, and order materials. Cloud-based sharing is a plus for collaboration.
Cost estimating tools. Some software tallies materials and provides rough cost estimates. These are ballpark figures, regional pricing, labor, and unforeseen issues will shift the number, but they help set a realistic budget.
Best Kitchen and Bath Design Software for Homeowners and DIYers
Several platforms cater to homeowners who want professional results without a steep learning curve.
SketchUp Free (web-based): A solid entry point for beginners. SketchUp’s interface is intuitive, and the free version includes basic 3D modeling. Users can draw walls, place fixtures, and apply textures. The learning curve is gentle, and the SketchUp community offers thousands of free 3D models (sinks, faucets, appliances). Best for users comfortable with a bit of trial and error.
RoomSketcher: Drag-and-drop simplicity with a strong fixture library. RoomSketcher is browser-based, so there’s no software to install. It generates 2D and 3D floor plans and allows users to visualize tile patterns, cabinetry, and lighting. The free version is limited: paid plans unlock high-resolution images and detailed floor plans. Ideal for quick layouts and client-ready visuals.
HomeByMe: Another web-based tool with a large catalog of furniture and fixtures. HomeByMe offers photorealistic rendering and is well-suited to users who want to test multiple design variations. The free tier has export limits, but it’s enough for most DIY projects. The interface feels more like a game than CAD software, which lowers the intimidation factor.
Chief Architect Home Designer: A step up in complexity and cost, but closer to what professionals use. Home Designer includes advanced features like electrical layout, plumbing diagrams, and automatic material lists. It’s desktop software (Windows/Mac) with a steeper learning curve, but the results are contractor-ready. Worth considering for whole-home renovations or users planning multiple projects.
Many DIYers also browse design inspiration galleries to gather ideas before jumping into software. Real-world photos help clarify style preferences and identify must-have features.
Free vs. Paid Design Software: Which Is Right for Your Project
Free software works well for straightforward projects: a single-wall kitchen refresh, a bathroom vanity swap, or testing whether a new layout improves flow. Paid tools make sense for complex renovations, multi-room projects, or when detailed material lists and professional rendering matter.
Free software pros: Zero cost, low commitment, and often web-based (no installation). Great for exploring ideas, learning the basics, and producing simple floor plans. Many free tools allow basic 3D visualization and export to PDF.
Free software cons: Limited fixture libraries, lower-resolution exports, and fewer advanced features (lighting simulation, electrical layouts, cost estimating). Some free versions watermark exports or restrict the number of projects.
Paid software pros: Expanded libraries, high-quality rendering, and contractor-ready outputs. Paid tools often include material lists, cost estimates, and technical diagrams (plumbing risers, electrical schematics). Better support and tutorials are common. Subscriptions typically range from $10 to $50/month, or one-time purchases from $100 to $500.
Paid software cons: Upfront cost and a steeper learning curve. Users investing in paid software should plan to spend a few hours mastering the interface.
When to go paid: If the project involves structural changes, adding square footage, or coordinating multiple trades (plumber, electrician, HVAC), paid software pays for itself by reducing errors. For a $20,000+ renovation, spending $100 on software is a rounding error, and it might prevent a $2,000 mistake.
For bathroom projects combining new fixtures with layout changes, using tools that help plan both the fixture arrangement and plumbing routes ensures code-compliant installations.
How to Get Started with Your First Design Project
Starting with accurate measurements prevents downstream headaches. Grab a 25-foot tape measure, a notepad, and a helper if possible.
1. Measure the space. Record overall room dimensions (length, width, ceiling height). Note locations of doors, windows, electrical outlets, light switches, and plumbing stub-outs. Measure from corner to corner and from fixed elements (e.g., door casing to opposite wall). Don’t forget to measure door and window trim widths, those inches matter when placing cabinets.
2. Photograph existing conditions. Take wide shots and detail photos of plumbing, electrical panels, and any structural elements (posts, beams, vents). These references help during design and troubleshooting.
3. Input dimensions into software. Start with walls, then add doors and windows. Most programs auto-generate wall thickness (typically 4.5 inches for interior walls with 2×4 framing and drywall). Verify that your software accounts for actual vs. nominal dimensions if you’re planning built-ins or custom cabinetry.
4. Place major fixtures first. In kitchens, start with the sink (often centered under a window), then the range, then the refrigerator. The classic work triangle (sink-stove-fridge) keeps traffic efficient. In bathrooms, position the toilet first (it’s the least flexible due to plumbing), then the vanity, then the shower or tub.
5. Test clearances. Building codes and common sense require minimum clearances. Kitchens need at least 15 inches of counter space beside the cooktop and 42 to 48 inches of aisle width for one-cook or two-cook layouts. Bathrooms require 21 inches of clearance in front of toilets and 30 inches in front of sinks (per IRC).
6. Experiment with finishes. Swap tile, paint, and countertop materials. Visualizing a matte black faucet against white subway tile or quartz versus butcher block helps finalize material orders. Resources like curated design galleries offer real-world examples of material pairings.
Common Mistakes to Avoid When Using Design Software
Even the best software can’t prevent user error. Watch out for these common pitfalls.
Skipping accurate measurements. Guessing wall lengths or fixture locations leads to designs that don’t fit reality. Measure twice, input once.
Ignoring door swings and drawer clearances. A cabinet door that hits the refrigerator handle or a vanity drawer that collides with the toilet is a design flaw software can reveal, if the user models it correctly. Always show door arcs and drawer extensions in the layout.
Forgetting about plumbing and electrical. Moving a sink three feet might look great on-screen, but relocating drain lines and supply lines adds cost and complexity. Same for electrical: adding a pendant light over an island requires a ceiling junction box and potentially new wiring. Flag these changes early and get quotes from licensed trades.
Overlooking ventilation and code requirements. Bathrooms need exhaust fans (typically 50 CFM minimum per IRC), and ranges need ventilation (ducted range hoods are preferred for gas cooktops). Software won’t enforce code, so users must research local requirements or consult a pro.
Choosing unrealistic finishes. A floor-to-ceiling marble shower looks stunning in 3D, but if the budget allows only ceramic tile, the real result will disappoint. Design within budget, or plan the project in phases.
Not saving versions. Design software lets users experiment freely, but it’s easy to lose a good layout in a flurry of edits. Save multiple versions (“Layout_v1,” “Layout_v2_island_moved”) to preserve earlier ideas.
For projects involving detailed cabinet layouts and installation, double-check that software dimensions match the actual product spec sheets from the manufacturer. A “36-inch” wall cabinet might be 35.5 inches actual width.
Conclusion
Design software turns vague ideas into actionable plans. It catches clearance issues, helps finalize finishes, and gives contractors the details they need to bid accurately and build confidently. Whether using a free web tool for a weekend refresh or investing in paid software for a major remodel, the time spent designing upfront prevents costly mistakes during construction. Measure carefully, model thoroughly, and don’t skip the prep work, digital or physical. When the design is dialed in, the build becomes straightforward.