Table of Contents
ToggleTile choice can make or break a small bathroom. Pick the wrong size, pattern, or finish, and you’ll shrink an already tight space even further. Get it right, and you’ll create the illusion of square footage you don’t actually have, plus add value and durability that outlasts paint or wallpaper. Small bathrooms demand smarter design decisions, and tile is where those decisions matter most. From size and layout to color and grout lines, every detail plays a role in how the room feels when you step inside. This guide walks through proven tile strategies that maximize space, light, and visual interest in compact bathrooms.
Key Takeaways
- Small bathroom tiles design is architectural rather than purely decorative, with every choice impacting space perception, durability, and resale value.
- Larger tiles (12×24 inches) work better than small ones in compact bathrooms because they reduce grout lines and create a more continuous, visually spacious surface.
- Vertical tile patterns and running tiles to the ceiling add perceived height, making low-ceilinged small bathrooms feel taller and more open.
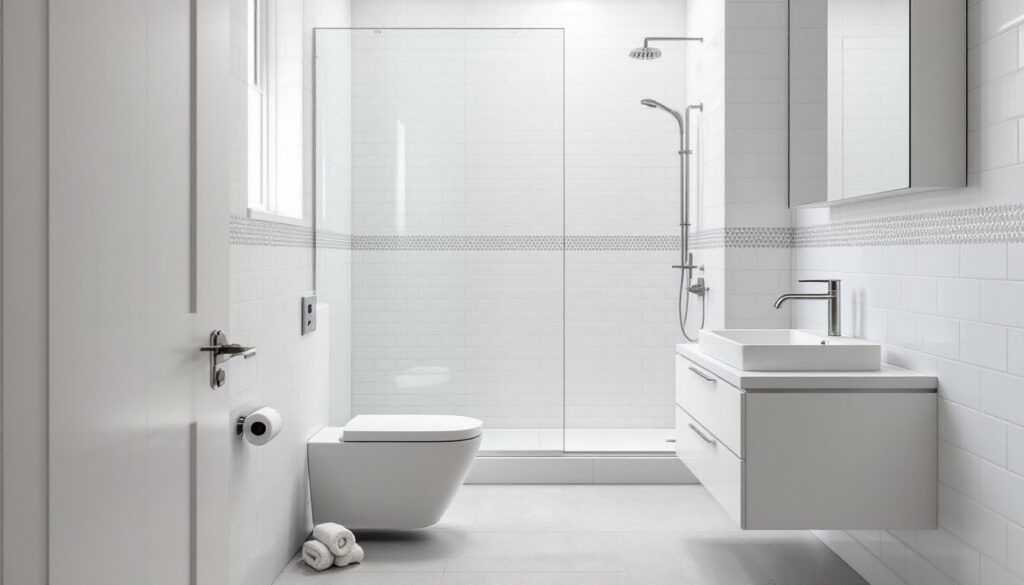
- Light colors and matte finishes maximize light reflection while hiding water spots, making them ideal for small bathrooms with limited natural light.
- Herringbone, chevron, and diagonal layouts add visual interest and can widen a narrow room, but complex patterns should be reserved for accent areas only.
- Matching grout color to tile keeps the surface unified and prevents visual fragmentation, which is crucial in small spaces where every element affects the overall perception.
Why Tile Selection Matters More in Small Bathrooms
In a spacious bathroom, tile is mostly decorative. In a small one, it’s architectural. The wrong choice creates visual clutter, chops up sightlines, and makes walls feel like they’re closing in.
Grout lines are the hidden culprit. Too many of them, from small tiles laid in busy patterns, create a grid that fragments the space. Your eye stops at every seam instead of gliding across the surface. Fewer, cleaner grout lines let the room breathe.
Tile also defines the room’s personality more than paint ever could. A 3×6-inch subway tile in matte white reads traditional and safe. A 12×24-inch porcelain plank in cement gray feels modern and expansive. The material you choose sets the tone before you hang a single towel.
Durability matters, too. Small bathrooms see heavy use per square foot, showers, splashes, and steam concentrate in tight quarters. Porcelain and ceramic tiles resist moisture and hold up under daily wear better than vinyl or laminate. They’re also easier to clean, which counts when every surface is within arm’s reach.
Finally, tile impacts resale value. Buyers expect tile in bathrooms, and quality installations signal that the home has been maintained. Cheap peel-and-stick or dated 4×4-inch builder-grade tiles can tank a bathroom’s appeal, even if everything else is updated.
Best Tile Sizes for Small Bathroom Spaces
Conventional wisdom says small rooms need small tiles. Ignore it. Larger tiles often work better because they reduce grout lines and create a more continuous surface.
12×24-inch tiles are the sweet spot for most small bathrooms. They’re large enough to minimize grout but not so oversized that cutting and fitting becomes a nightmare around toilets, vanities, and tubs. Install them vertically on walls to add height, or run them horizontally on floors to widen the space visually.
Large-format tiles (24×48 inches or bigger) can work on floors if the layout is simple and cuts are minimal. They create a sleek, almost seamless look. But they’re harder to install, require a flatter substrate, and any lippage (uneven edges) shows more. If the subfloor isn’t dead-level, stick with 12×24s.
Subway tiles (3×6 inches) remain popular for a reason. They’re not large, but their rectangular shape and classic layout keep grout lines organized and predictable. They don’t feel busy the way small square mosaics do. Just skip the contrasting grout, it draws attention to the grid.
Mosaics and penny tiles have their place, but use them as accents, not field tile. A 1×1-inch hex mosaic works in a shower niche or as a feature stripe. Cover an entire wall with it, and the room feels like a public pool.
Avoid anything smaller than 2×2 inches for large areas. The grout-to-tile ratio tips too far toward grout, and the installation cost climbs because of the labor involved.
Top Small Bathroom Tile Design Ideas That Maximize Space
Design isn’t just aesthetics, it’s optical engineering. The right tile layout can stretch a room without moving a single wall.
Vertical Patterns and Subway Tiles
Running tile vertically draws the eye upward and adds perceived height. This works especially well with subway tiles or narrow planks. Install 3×12-inch or 4×12-inch tiles in a vertical stack bond (tiles aligned in columns, not staggered) for a crisp, modern look that emphasizes ceiling height.
Traditional brick-pattern subway tile (offset by half) also works, but keep the grout color close to the tile color. High-contrast grout turns the pattern into a distraction. Use unsanded grout for joints ⅛ inch or smaller to keep lines tight and clean.
If the ceiling is low, take the tile all the way up. Stopping halfway creates a horizontal line that cuts the wall in two and makes the room feel shorter. Tile to the ceiling, or at least to the top of the shower surround, to maintain vertical flow. Many small half bath transformations rely on this exact strategy to add height without construction.
Large Format Tiles for a Seamless Look
Large-format porcelain tiles (12×24 inches and up) create an uninterrupted surface that makes walls and floors appear larger. Fewer grout lines mean fewer visual breaks, which keeps the space feeling open.
On floors, run 12×24-inch tiles parallel to the longest wall to elongate the room. Use rectified tiles (precision-cut edges) so you can install them with minimal grout joints, sometimes as tight as 1/16 inch. This near-seamless look is a hallmark of contemporary bathroom design inspiration.
In the shower, consider a slab-look porcelain panel (up to 5×10 feet). These require professional installation and a perfectly flat substrate, but they eliminate grout lines almost entirely. The effect is dramatic: it looks like natural stone without the maintenance.
One caution: large tiles show lippage more easily. Your installer needs to use a leveling system and work on a flat surface. If the substrate is questionable, step down to a midsize tile.
Color and Finish Strategies for Compact Bathrooms
Light colors reflect light and push walls back visually. Dark colors absorb light and advance toward you. In a small bathroom, that physics matters.
White and off-white tiles remain the safest bet. They maximize light reflection, especially in bathrooms with small or no windows. Glossy finishes amplify this effect, they bounce light around the room. But they also show water spots and soap scum faster, so plan on regular cleaning.
Matte and satin finishes hide imperfections better and feel more contemporary. They don’t reflect as much light, but the tradeoff is lower maintenance and a softer, less clinical look. For floors, always choose a matte or textured finish to reduce slip risk when wet.
Light grays, beiges, and greiges add warmth without darkening the space. They pair well with white fixtures and give the room more personality than pure white. Porcelain planks in a light wood-look finish bring warmth and texture without the maintenance issues of real wood.
Dark tiles can work as accents, a charcoal feature wall in the shower, or a black hex mosaic on the floor, but use them sparingly. Covering all four walls in navy or black will shrink the room unless you have exceptional lighting and high ceilings, which most small bathrooms lack.
Grout color is just as important as tile color. Matching grout to tile (or staying within one shade) keeps the surface unified. Contrasting grout emphasizes the grid and can make a small space feel choppy. If you want contrast, use it on an accent area, not the whole room.
Layout Patterns That Create Visual Interest
Pattern creates movement and interest, but in a small bathroom, restraint is key. Too much pattern overwhelms: too little reads flat and boring.
Herringbone and chevron layouts add elegance and draw the eye diagonally, which can make a narrow room feel wider. Use them with subway tiles or narrow planks (3×12 inches or 4×16 inches). They do require more cuts and waste, so budget an extra 15–20% on materials. Installation cost also climbs because of the precision needed.
A vertical stack bond (tiles aligned in straight columns) feels clean and modern. It works best with rectangular tiles and creates strong vertical lines. Pair it with rectified edges and tight grout joints for a seamless, contemporary effect often featured in small-space design galleries.
Diagonal layouts on floors can make a small room feel larger by directing the eye corner to corner (the longest sightline in a rectangle). This works with square tiles (12×12 or 6×6 inches). Expect more cuts along the perimeter and more tile waste, plan for 20% extra.
A border or accent stripe breaks up monotony without overwhelming the space. Run a 4-inch strip of mosaic or contrasting tile horizontally at mid-wall, or vertically as a feature panel in the shower. This adds a focal point and visual interest while keeping the rest of the room simple.
Avoid 複雜 patterns like basketweave, pinwheel, or multi-size mosaics on large surfaces. They create too much visual noise in a confined space. Save intricate patterns for small accent areas, a shower niche, the back wall of a vanity, or a small section of floor.
Running bond (traditional brick pattern, offset by half) remains the most versatile and forgiving layout. It hides imperfections, works with nearly any tile shape, and doesn’t require precision cuts. If you’re DIYing and it’s your first tile job, start here. Stunning tile ideas from home design platforms often showcase how classic layouts still deliver in modern spaces.
One final tip: when in doubt, run floor tiles in the same direction as the planks or joists below (if you know the framing orientation). This can reduce the chance of cracking from subfloor flex, especially with large-format tiles. If you’re unsure, consult your tile installer or check the substrate with a level and straightedge before starting.